GitHub: A Quick Tutorial
GitHub

Table of Content
- Introduction
- Lets get started
- create Repository
- Project to Upload
- Upload Project
- Download and modify a repository
Introduction
GitHub is a free code hosting platform for version control and collaboration. It enables us to have access to someone else code that we can use and even modify. GitHub uses Git. Git is the version control system.
For a developer or an IT specialist, it is essential to have a GitHub account with projects on it.
Some terms that are needed to know:
Push - Add the local repository to the remote/online repository.
Clone - Make a copy of the remote repository to local machine.
Pull - used to fetch and download content from a remote repository and immediately update the local repository to match that content.
Commit - Record changes that happened to one or more files in the repository.
Lets get started
steps:
- Create a GitHub Account. Follow the instructions.
- Lets create a new repository.
- Have a project ready.
- Upload Project Using Command line
- Clone the project from remote to local
- Modify a file and re-upload it
First Create an Account then follow the rest of the step.
create Repository


Just Choose the Name of the repository. Mine is Face-Detection.
IMPORTANT STEP:
MAKE SURE THAT THE ADD A README FILE IS CHECKED-OFF. OTHERWISE IT WILL CREATE CONFILCT.
SAME THING FOR THE .GITIGNORE.
After that click the green button "Create repository".

Then this window will show up.

These code below is important. These are instruction of what to do to perform a commit and push.

Project to Upload
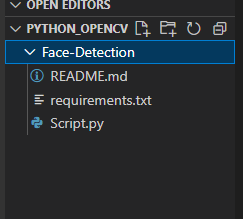
I already have a project ready. Its a face detection algorithm using OpenCV-Python.
I am using VS Code as my IDE. In VS code, there is an extension called GitLens. It makes a tab call source control. Its is quite useful to visualise which files are being commited.
Upload Project
First lets add our remote repository using the command below:
git remote add origin https://github.com/AtishJoottun/Face-Detection.git
git branch -M main // rename the branch to main
This line connects to the remote repository.
lets prepare the local repository:
git init // Initialise the directory for commit
git add . // Add all the files in the staged step(Meaning ready to commit).
git commit -m "ENTER A COMMENT HERE" // Save the files to the local repository


Lets Upload it to our remote repository


Download and modify a repository
Download the repository

Modify any files. I modify the README.md to add description of the program.

git add README.md // add the modified file into staged changes

After add, commit and then push.


Comments
Post a Comment